
AI LogoChamp WP Tool Site Builder
User Guide and Item Documentation
How To Get Started
Plugin Installation
Licensing Your Website
What Is Your License Key?
▪ Purchase Through JVZoo:
You can use either one of these:
1.) Your Email Address (the one that you input on JVZoo Checkout page, or your Paypal email address)
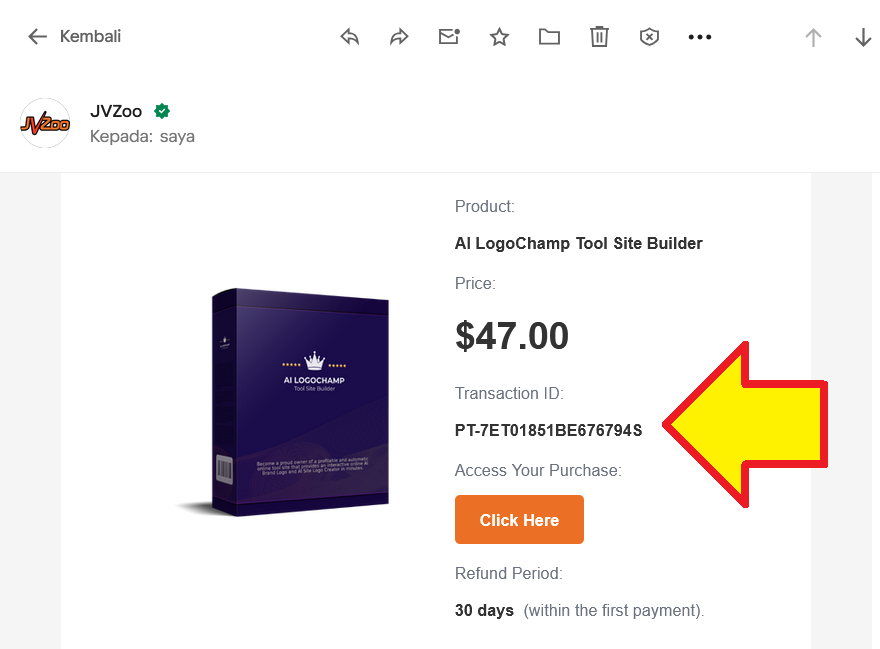
2.) Or your JVZoo Transaction Key, something like this: PT-12345ABC67890
Those data are available on your JVZoo Receipt: https://www.jvzoo.com/portal
Also available on your Email Receipt like this:
▪ Purchase Through WarriorPlus:
Your License Key is the purchase email address (or Paypal email address) that you use to purchased AI LogoChamp. If that doesn't work, check your WarriorPlus receipt and see what is the email address recorded in the receipt.
Forms Setting Setup
Most settings available in this section are self-explanatory.
You can choose the color schemes and change the text for your AI LogoChamp form.
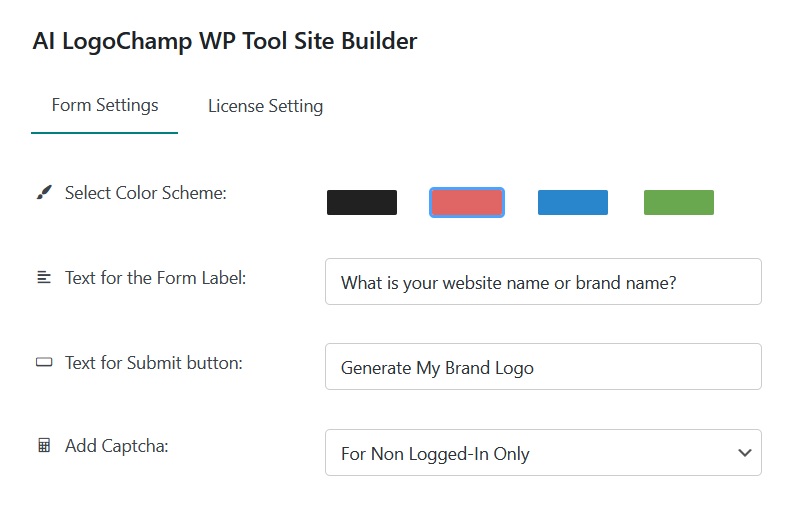
Anytime you make changes on the form, remember to click the Save Changes button.
Adding AI LogoChamp Form to Your Content
We are going to utilize WordPress shortcode to display AI LogoChamp form for your website visitors or users.
To do that:
Go add a new WP Page or WP Post, and click the Block Inserter button:
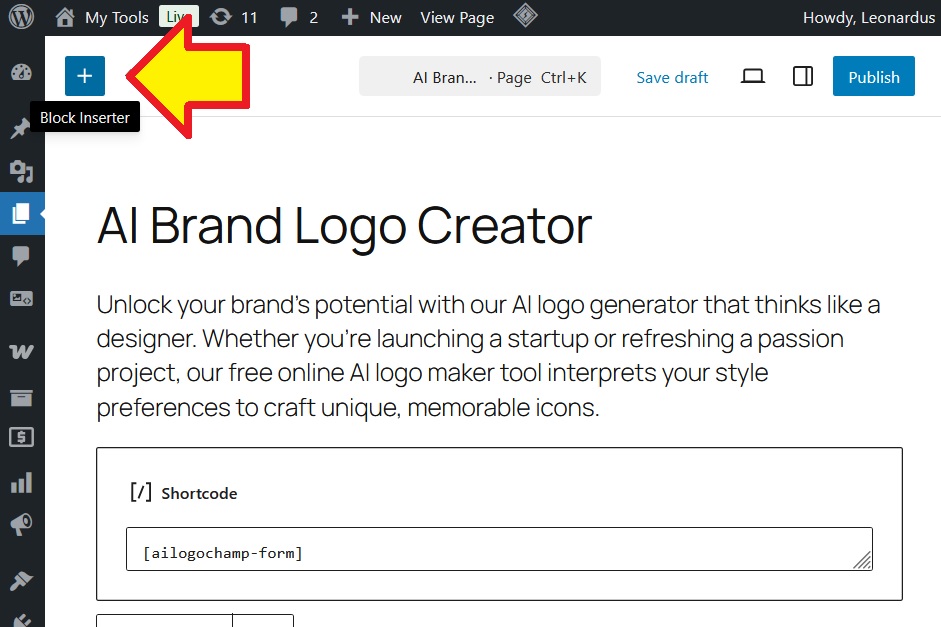
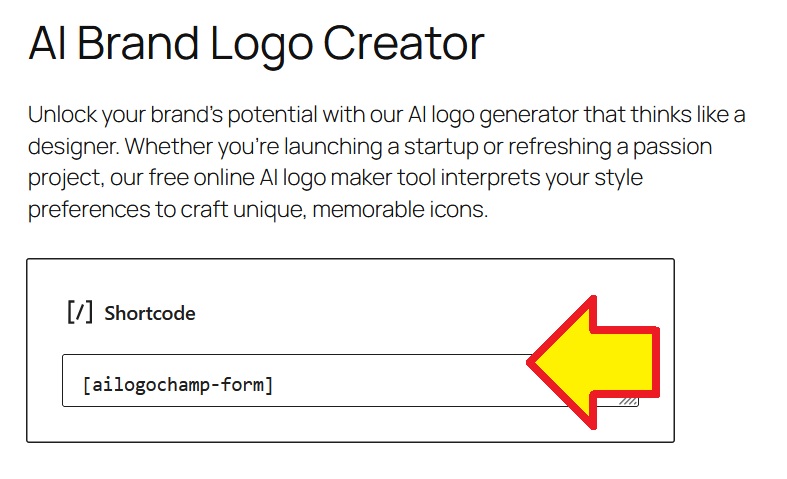
Type shortcode on the search bar, and click or drag the Shortcode block to the editor screen.
After that, input this text inside that Shortcode block: [ailogochamp-form]
It will be like this:
It is recommended to add several paragraphs to the content, to make sure people understand what is the function of the tool is.
After that remember to Publish the page. Or set it to Draft if you want to preview it first.
If you are using a Page Builder such as Elementor or Divi, the process is the same. Those page builders support WP Shortcode, so you can put the shortcode anywhere inside your content.
Example to add a Shortcode in Elementor: https://elementor.com/help/shortcode-widget/
Once you publish the page, now your AI LogoChamp tool site is ready.
Your AI tool site is fully functional and ready to start getting traffic.
Share the page to Reddit, Facebook, etc. so people will know about your tool site.
Use our ReCrawl AI software so AI engines will crawl and index your tool page, or our WikiLinkRobot software to increase authority backlinks of your tool page.
ADVANCED USERS
Using AI LogoChamp PLATINUM Extension
// IMPORTANT: THIS GUIDE IS INTENDED FOR PLATINUM USERS ONLY //
If you don't have the Platinum extension yet, you can still grab it here.
Thank you and congratulations for grabbing the PLATINUM extension.
Note that this is an extension for AI LogoChamp Core plugin, so make sure you install and activate BOTH of them.
After both of them are active, then all the PLATINUM functions will be unlocked:
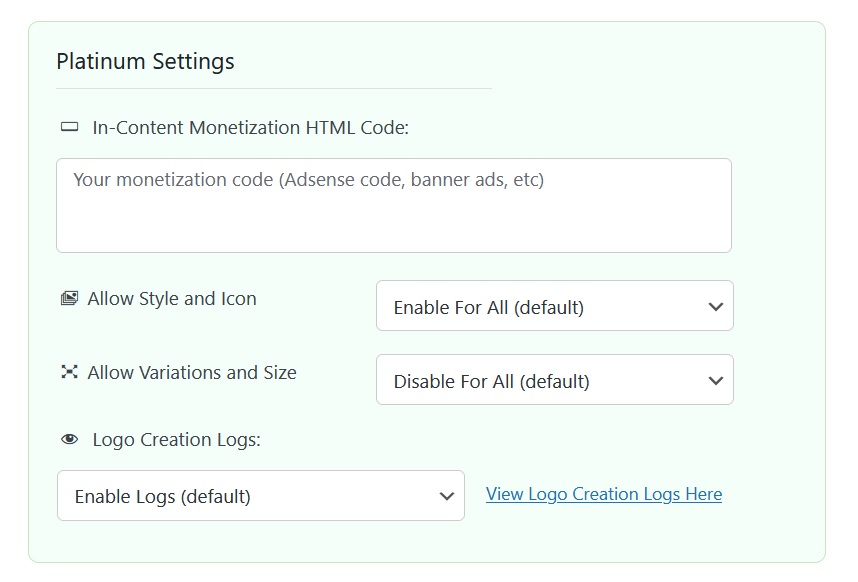
You can input your monetization code, enable or disable any form setting and enable/disable Submission Logs.
To view AI LogoChamp Logs, go to AI LogoChamp menu -> All Logo Creations.
And click Edit on the creation Log that you want to view.
Using AI LogoChamp Showcaser
Thank you and congratulations for grabbing the Showcaser extension.
Note that this is an extension for AI LogoChamp Core plugin, so make sure you install and activate BOTH of them.
To start using the Showcaser Extension:
[ailogochamp-showcase sort="latest"]
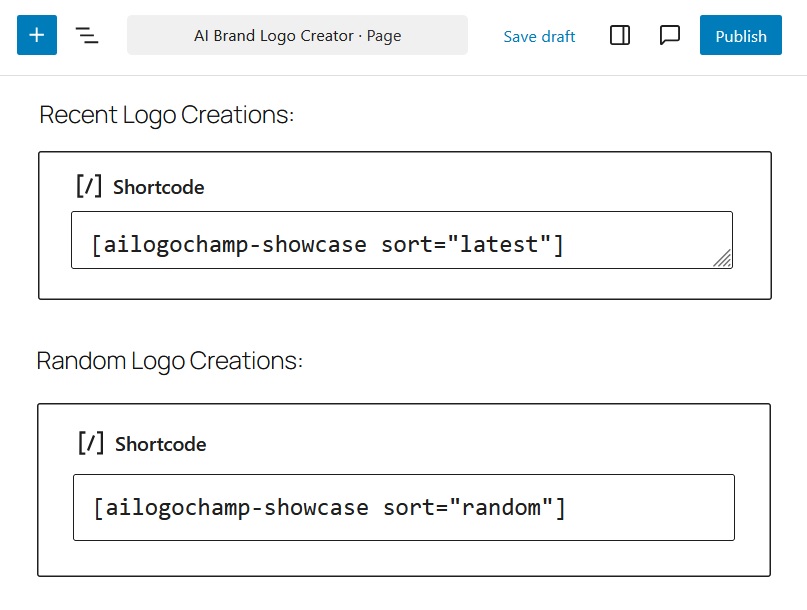
[ailogochamp-showcase sort="random"]
Protecting AI LogoChamp Form for Registered Users Only
// IMPORTANT: THIS IS A GENERAL GUIDE INTENDED FOR ADVANCED USERS ONLY //
If you never setup or built a membership sites using WordPress before, this guide might be not for you. Please consult with your tech staffs, developer or coder staffs if you have never setup a membership site with WordPress before.
If you intend to build a membership site (either free or paid membership), of course you want to make sure that only registered users can use the AI LogoChamp tool on your website.
So how do we achieve that?
There are many options you can do.
The First Option:
You can utilize just one WP Page. So you create a new WP Page like explained on the above steps..
.. but this time the shortcode should be like this: [ailogochamp-form url="https://mysite.com/pricing"]
Input that shortcode to your content, and change the url value to your Member Dashboard page, or maybe to your Pricing page.
That shortcode pattern will tell your website, that if someone is not logged in, then AEO Auditor form will redirect them to either to your Member Dashboard page or your Pricing page, whichever that you set in the url value.
So they have to be logged in or register as a member to use the tool.
With that being said, it means you will need to setup a Member Dashboard page or the Pricing page.
Those pages should be taken care by the membership plugins and/or page builders that your website is using.
There are plenty for membership plugins available for free to use on WordPress.org: https://wordpress.org/plugins/search/membership/
And AI LogoChamp is 100% compatible with all of them.
The Second Option:
This time we will utilize two WP Pages:
The first page acts as a Landing page or Homepage, where the AI LogoChamp form is protected for logged in users only.
And the second page, will be your Member Dashboard page with AI LogoChamp form inside it.
For the first page, you create a new WP Page.
.. And the shortcode inside that first page should be like this: [ailogochamp-form url="https://mysite.com/pricing"]
You can set this first page as a Homepage, from Settings menu -> Reading, and Homepage Displays should be "a static page" with this page is selected.
Whereas for the second page which is maybe your Member Dashboard page, protect this page with your membership plugin, and put this shortcode inside its content: [ailogochamp-form]
Note that you can use any WP theme or WP Page Builder for your membership pages (Pricing page, Member Dashboard page, Registration page, etc), but it is recommended to use a page builder to setup your membership pages.
The free version of Elementor or Divi would be more than enough.
And AI LogoChamp is 100% compatible with all popular WP Page Builders :o)
FAQs, Support And Troubleshooting
The package could not be installed. No plugins found.
If you see that message when trying to install AEO Auditor as a plugin, it is because the file uploaded was wrong.
Please unzip/extract the purchase file that you download from WarriorPlus.
After the purchase file is unzipped, you will find the correct plugin ZIP file that you can upload as a plugin.
What is my License Key?
The License Key should be the email address of your Paypal or purchase email that you use upon purchased of AI LogoChamp Core Version (frontend offer), not the upgrade.
You can also use your JVZoo transaction ID, which can be found on your Email Receipt.
Your JVZoo transaction ID looks like this: PT-1234567890
How to Update AI LogoChamp to the latest version?
If there is a new version for AI LogoChamp Core and extensions, you should see a notification from WP Dashboard -> Updates.
From that page you can retrieve the latest version using the Update button.
Recommended hosting and WordPress environment
It is recommended that your website support the minimum WordPress requirements:
https://wordpress.org/about/requirements/
So the recommended PHP version for your hosting should be PHP 8.3 and use the latest WordPress version.
For best experience, the server PHP limit recommendation:
max_input_vars : 5000 or higher
max_execution_time : 60 or higher
max_input_time : 60 or higher
If your server has Cpanel, you can set that value from "Select PHP Version" -> Options.
If your server doesn't use Cpanel, please consult with your hosting provider to increase that PHP limit.
After submit, the loading won't finish
Our AI tools utilizes AI engines from Google Gemini, ChatGPT and Claude to generate results.
Sometimes their servers get overloaded and that is beyond our control. The good news is: their server rarely go down for more than 10 minutes, so it should be just a temporary issue.
You can check Gemini uptime status here:
https://aistudio.google.com/status
And OpenAI uptime status here:
https://status.openai.com/
PLATINUM Extension: I installed and activate this, but don't see AI LogoChamp menu in my WP Admin
The Platinum upgrade is an extension for the Core version.
So make sure you install and activate BOTH the Code version and the Platinum version as well.
SHOWCASER Extension: I installed and activate this, but don't see AI LogoChamp menu in my WP Admin
The Showcaser upgrade is an extension for the Core version.
So make sure you install and activate BOTH the Code version and the Showcaser Extension as well.
SHOWCASER Extension: Can I display both the Recent creations and Random logo creations in one page?
Yes of course. Simply place the Shortcode of both of them anywhere inside your content.
Have other questions?
Another benefit driven headline here
Donec id elit non miost porta gravida at eget metus fusce dapibus tellus ac cursus commodo tortor mauris nibh utes fermentum massa justo sit amet risus donec.
"Platea venena tempor ipsume dolors vulput vertis proina semper intege portti laoret."

Felicity F. London, UK
Join the tribe, get a deal
Sign up for our newsletter and be the first to know about our deals and promos.
WPTHEMEPLUGIN
Founded in August 2011, we at WpThemePlugin just want to share simple, unique and useful products for all online entrepreneurs .
From the Founder

"May all beings be happy, content & fulfilled"
-Leonardus
Latest Listings
© 2026 WPThemePlugin.com - All Rights Reserved
All trademarks & logos are the property of their respective owners. This site and the products/services offered are not associated, affiliated nor endorsed by any business listed on this site nor have they been reviewed tested or certified by any other company